
How do I reinstall Windows?
If your system was completed after July 2024, please follow this guide instead.
If you already have a Windows 11 recovery drive, please skip to "Windows Reinstall Process" below. Otherwise continue this guide from the top.
Creating a Windows 10/11 Recovery USB Drive
If you do not have a Windows 10 or 11 recovery you can follow the below steps to create a Windows recovery USB drive. This method will require access to a working Windows PC and a flash drive that is at least 8GB. Please follow the link below to download the Windows Media Creation Tool. Please note that any data you have on the flash drive will be deleted.
Click here to download Windows 10's Media Creation Tool
Click here to download Windows 11's Media Creation Tool

Using the tool to create installation media:
- Select Download now and select Run. You need to be an administrator to run this tool.
- If you agree to the license terms, select Accept.
- On the What do you want to do? page, select Create installation media for another PC, and then select Next.
- Select the language and edition. Generally it will automatically be selected based on the computer you are using.
- Select which media you want to use: "USB flash drive. Attach a blank USB flash drive with at least 8GB of space. Any content on the flash drive will be deleted."
- Once the process has completed, continue to the Windows Reinstall Process steps below.
Windows Reinstall Process
You would perform this method using the USB recovery flash drive you’ve created using the Windows Media Creation Tool. Make sure any external storage drives are unplugged from the system or they may be accidentally deleted during this process.
You want to start with the system turned off and the Windows Recovery Drive inserted into a USB port on the motherboard (the back of the computer).
Note: The process below will WIPE ALL DATA on the system c: drive (Windows OS drive).
- Power on your computer.
- Immediately after powering on, continuously tap the appropriate key
- (ASUS: F8 key; Gigabyte: F12 key; MSI: F11 key; ASRock: F11 key, ML-16/17: F7 key)
- A prompt with options should display on a black & white screen, called the “Boot Options Menu”.
- Select the name of your USB drive. Example: UEFI: (KingstonDataTraveler) or UEFI: Generic, Partition 1 (Generic). Please note especially for Windows 10, there might be multiple of your drive listed, always select UEFI
- After selecting the drive, it should boot into the USB device and begin the Windows Installation steps.
- Warning: make sure any external storage drives are unplugged from the system or they may show up during the install and thus you may accidentally have them deleted!
-
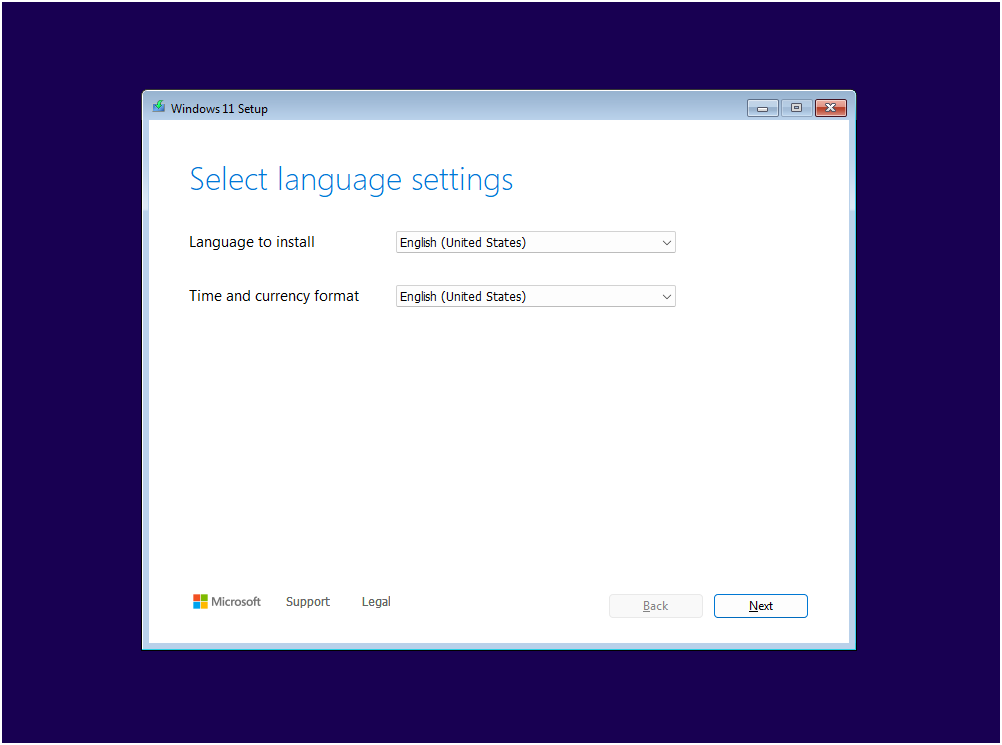
On the initial setup screen, enter your language and other preferences, and then select Next.
-
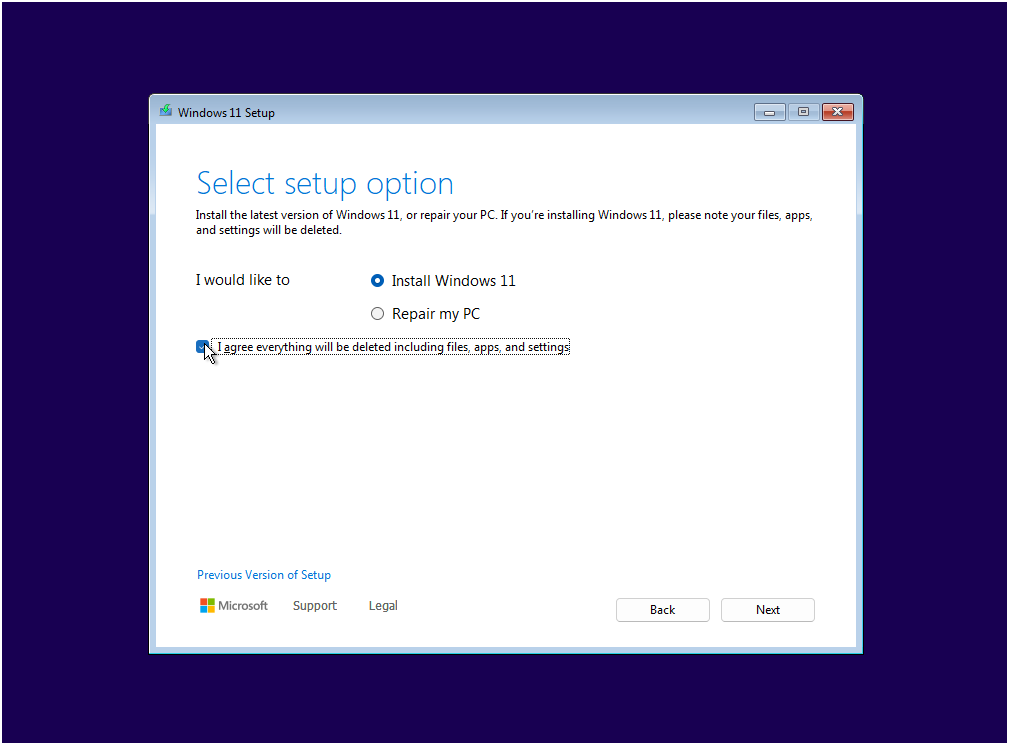
Proceed with the installation as it will ask you what setup option you'll take.
You'll have two options here, Install Windows 11, or Repair My PC. Repair My PC will skip the install and attempt to use the internal recovery method within your SSD itself. If there was already an issue with your PC it would strongly be recommended to not use that recovery method and use your flash drive that was created to reinstall the OS
-
On the Enter the product key to activate Windows page,
enter a product key if you have one or at the bottom there is a "I don’t have a product key" option to allow you to skip it.
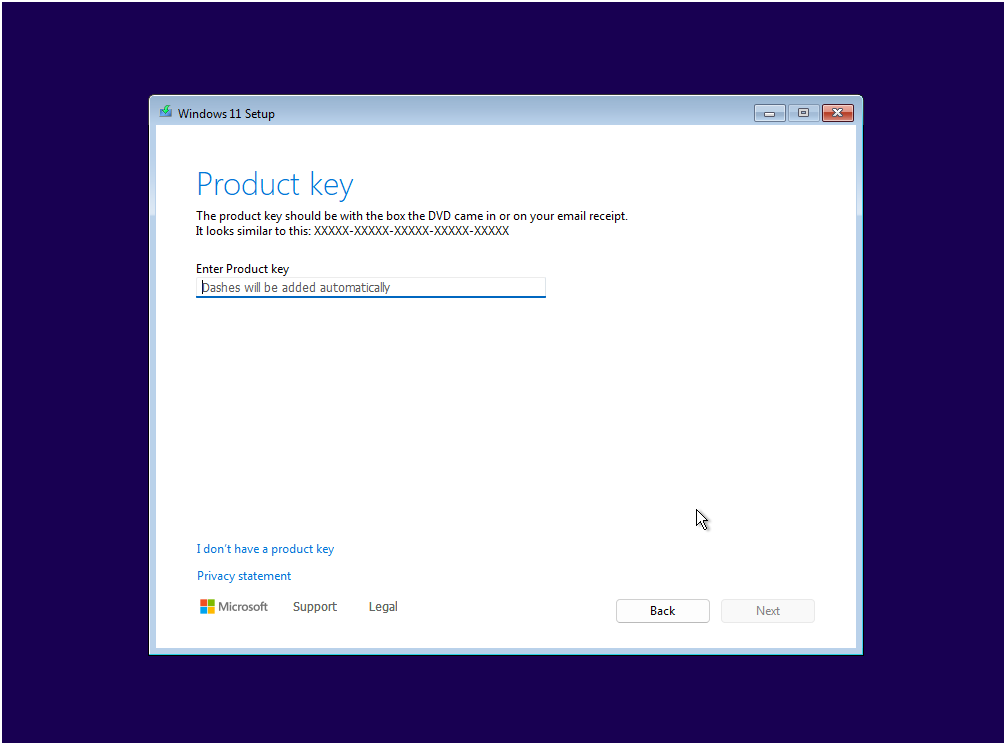
On MAINGEAR PCs, the Windows key is typically located on a sticker on the rear or bottom of the system.
There is usually a holographic tag that will state the Windows version and the 25 digit key used for activation - On the License terms page, select I accept the license terms (if you agree to them), and then select Next.
- Please Select where you are going to Install Windows on your system. Typically most computers will have a single drive listed, or at most two drives as you may see your flash drive here. If you have multiple drives, please be mindful to select your boot drive for your MAINGEAR system. This will typically have a few partitions listed showing (Windows, Recovery, System Reserved, IF REINSTALLING) Otherwise you will want to check your drives to see what you have in your system and select the correct drive accordingly.


- Once you have identified your partitions select the Delete Partition option (if no backups are necessary) for each partition you have on the OS/Windows drive. Make sure to ONLY delete the drive that the OS/Windows is located on, no other drive has to be deleted. When you’re done deleting each partition on the OS drive, there should be one single partition left called the “Unallocated Space”.

- When you've finished for deleting the partitions or if this is a new drive, select the Unallocated Space and select Next.
-
Ready To Install:
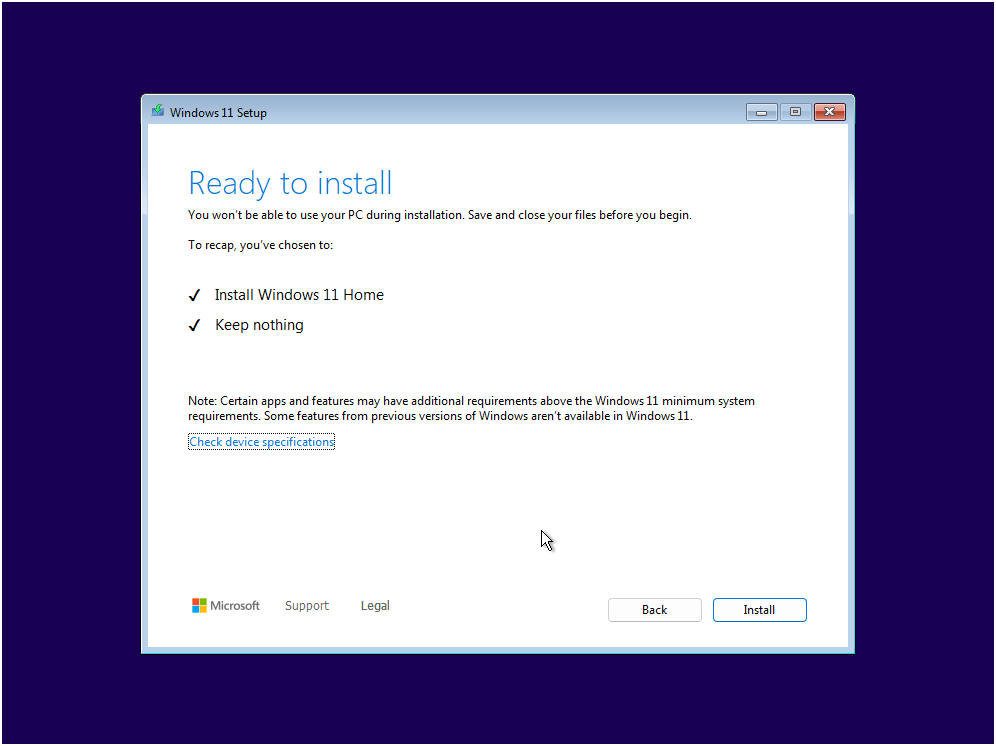
Windows will give one quick last check before continuing and lastly click Install to continue.
-
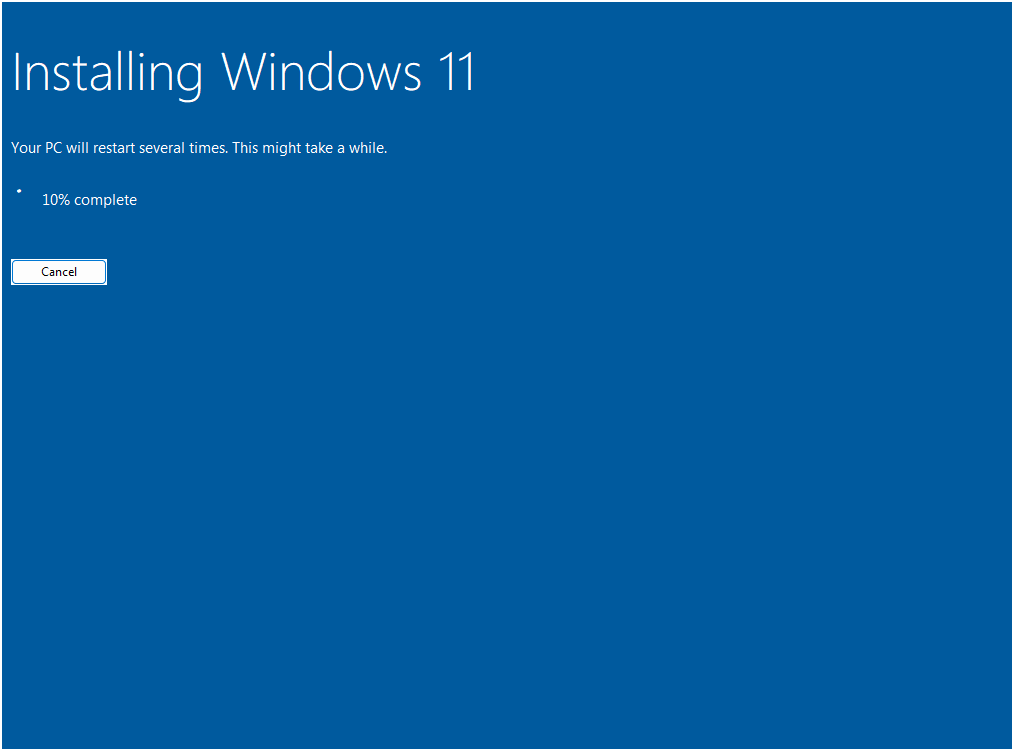
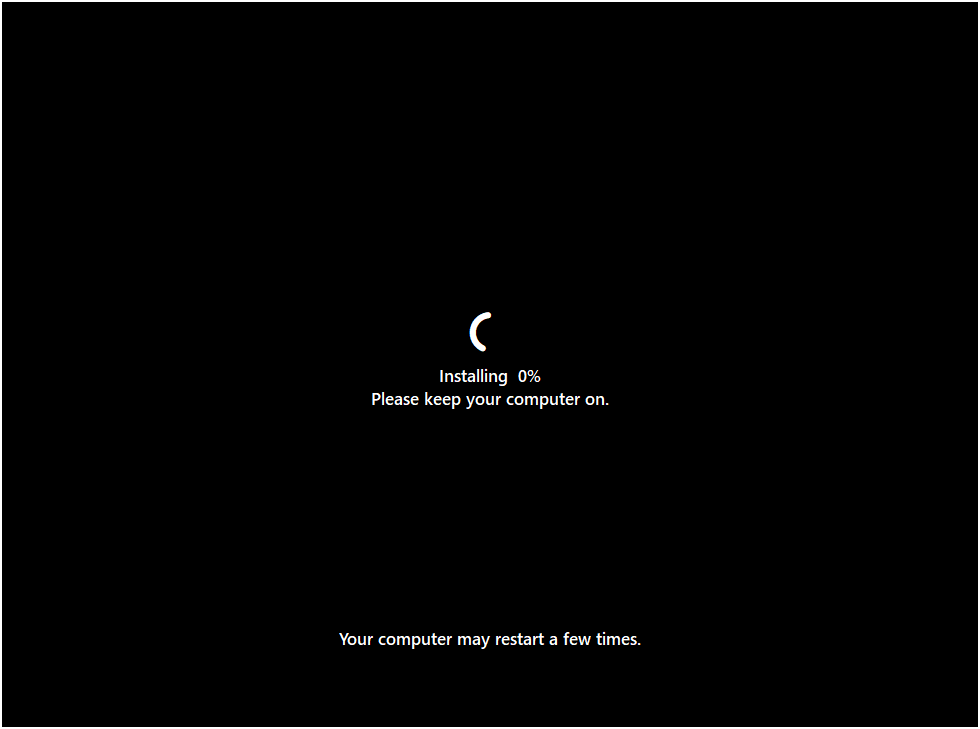
You may see several different screens during the install of Windows


Lastly during install you may need a network driver for your system It will need to be extracted to a folder on the root of your flash drive to install your network drivers.
Typically for internet Drivers it would be:
Realtek: Ethernet (Win10/Win11 Auto Installation Program) | NDIS
WiFi Drivers for select motherboards we use:
Please make sure you keep your PC up to date by running Windows update after finishing your Windows Install
If you have questions or concerns, please contact one of our MAINGEAR Support agents: (908-620-9050) or support@maingear.com